Rachel Makeup

Rachel Makeup

Monday 23 September 2013

Real Techniques by Samantha Chapman

Real Techniques by Samantha Chapman
Everyone has been raving about the new Real Techniques makeup brushes available in Boots and some pharmacies. The majority of people would be more familiar with Samantha Chapman from her YouTube channel Pixiwoo where she uploads video tutorials with natural makeup looks to avant garde looks. Her brother Jim Chapman is also a youtuber. 

Recently, Chapman was contacted by Paris Presents (the makers of Eco Tools and other beauty products) to develop an affordable make-up brush line called "Real Techniques." The brushes are cruelty-free, made of synthetic Taklon and not tested on animals. Each brush head is hand-cut and the brush collection works with a wide variety of make-up products from powders to creams and liquids. 

I am obsessed with this brush range. It's great affordable and leaves a flawless makeup look.


Don't forget to subscribe by email or follow me on Bloglovin'!!

Love Rach xoxo


Thursday 19 September 2013

Natural Makeup Look


For those mornings when you don't feel like putting in too much effort or when you don't have as much time as you'd like or perhaps you prefer the natural look anyway, here is a simple natural daytime look for you. 

I love glows dewy skin, I'm not a fan of matte matte skin so I don't use powder afterwards unless I really have to and I love using a cream concealer as a high,igniter or Highbeam from Benefit. 

What I Used:
LA Creative Mineralise Foundation in Tender Beige and Sandy Beige (had to mix to get the right colour)
LA Creative Eyebrow Colour in Blonde (for contouring)
LA Creative Cream Concealer in Light and Medium  (Medium for under eye area, Light for highlighting)
LA Creative 3 Piece Palette in Natural (darkest colour for brow colour) 
FOR BIG BROWS FILL IN YOUR ARCHES!!
Benefit Big Beautiful Eyes Palette (lightest on base, second lightest in crease, darkest outside corners) 
Rimmel Scandaleyes Retro Glam mascara (and lots of it)
LA Creative clear gloss 

And there you have it. Simple! And if you're going straight to the bar after work throw a bold red or purple on your lips and there you have an on trend makeup look and your nighttime look all in one! 

Side Note: I'm thinking of starting vlogging (video blogging) but not sure. Gimme some feedback in relation to this. 

Don't forget to subscribe by email or follow me on Bloglovin!!!

Love Rach 

Wednesday 18 September 2013

Dublin High Street Makeup

Dublin's High Street Makeup Look
It's becoming more and more apparent that us Dublin gals are as up to date with makeup trends as any other nation. Which is not surprising knowing that Ireland spends the most on cosmetics than any other European country (I kid you not).
"People watching" is definitely my guilty pleasure. Looking at people's individual style and their makeup trends. One trend I have definitely seen a lot of is a pop of colour on the lip and a lick of eye liner. 
This look is super achievable and affordable if you want to go drug store brands or my fav LA Creative brand which is what I will be blogging on.


What you will need:
All LA Creative products......
Skin Transforming Foundation in Linen (I'm super pale!)
Bronzer in Safari (love the look of this product)
Brow Palette in Soft Smoke (big fan)
Gel Liner
3 Piece Palette in Natural
Blusher in Coral Sun
Translucent Powder
Primer in Pore Perfecting (for that oily area) 
Cream concealer in Light and Medium
Mascara in Sensitive (eyes need some TLC)
Luxurious Matte Lipstick in Red Carpet
Luminizer Stick


Step by step:

1. CTM!! Cleanse, Tone and Moisturise. It's the only way to get that flawless finish. 

2. Prime the face with Pore Perfecting Primer

3. Apply foundation preferably with a large stippling brush blending it in nicely to the face making sure never to use too much. 

4. Taking LA Creative's Cream Concealer in Medium with your ring finger, lightly dab the concealer under the eye. The ring finger is used because it is the finger that uses the least amount of pressure. I use the Medium concealer because I do not want to highlight the under yet so I used a slightly darker concealer to counteract the grey, purple and blues under the eye. 

5.I always like to contour next simply because it is how I always apply my makeup. Using a contouring brush (angled fluffy brush) find the underside of our cheekbone and using inward sweeps gently apply Safari bronzer in towards the nose. I don't like applying bronzer in the hollows of the face (under cheekbone) because it makes people look gaunt more than anything. Unless that is the look you are going for of course! 

6. Taking your blusher brush apply Coral Sun from the outer side of the eye outwards. We want to keep the under eye area nice and bright so avoid putting your blusher there. 

7. Moving on to the brows (my fav part), I'm loving Cara Delevinge and her Power Brow cult she has accidentally created so taking a small angled brush and our soft smoke palette (a dark brown eye shadow can also be used) we start at the inside of the brow using flicking feather like motions to create natural hairs. Creating a boxy effect stencil out the brow underneath and on top until you get to the arch. Ignoring the arch (for our power brow look) and sloping downwards for the end. Using our feather like motions fill in the brow where colour is needed to make the brow look full and complete. I prefer using shadow as opposed to pencil because I feel pencil looks too stamped on the face. 

8. On to the eyes, I'm not sure if I think eye primers are a little gimmicky or not. I prefer to use a dab of concealer on the lid and the a pat of translucent powder on top. Always worked for me. So taking our eye palette using the lightest colour sweep the base onto the lid. Then using the second lightest colour blend it into the crease and all the way towards the inner corner of the eye almost creating a cut crease but keeping it a little more natural. Finally using the darkest colour, blend it on the outer corner of the eye to elongate the eye. 

Side Note:
People most commonly have eyes slightly too close together so to counteract this, brighten the inside corner of the eye darken the outer corners. Ta-da!

9. Next is the dreaded gel liner. Using either an angled brush or a liner brush (whichever you feel most comfortable with) take a little amount of the gel liner starting with the eye your weakest at create the flick first, then mimic this flick on the other eye. Connect the flick with the lash line and this is where you decide how thick or thin your are going to go. I like to keep it slightly thin because it makes my eyes look larger. I also like to bring the liner in to the inner corner of the eye but that's up to how you like your liner yourself. 

10. Lick some mascara onto those lashes. The more the merrier in my opinion!

11. Take the Luminizer Stick the dab it on top of the cheekbone and underneath the eye area. Take your ring finger and blend it into the skin. 

12. On to the lips, you can use a lip line if you wish, I always like to because I feel my lippy stays on so much longer with it. Pencil in the entire lip in a red lip liner. Taking a lip brush or a brush that you can use as a lip brush. Generally you should look for a small dense sturdy brush that won't move on you or create sticky out hairs that ruin your lip colour. I actually use Bobbi Browns Smokey Eye brush. Taking your Red Carpet lipstick paint your lips in with this beautiful colour. You don't have to use red, you can use pink, purples or even browns. I prefer a matte lipstick because it doesn't move on my lips. 

You can drop or add different parts to this look. You don't necessarily have to use liner and you can go as strong or light as you like with the contouring depending on if it is day or night look. 

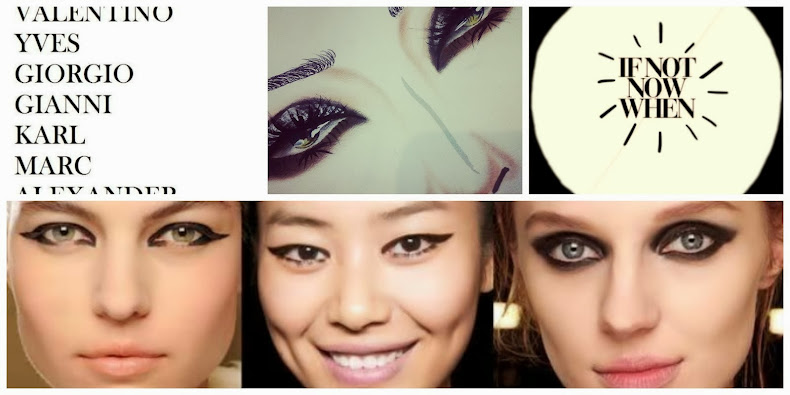
Here's some photos of the makeup from Dublin Fashion Week


Don't forget to subscribe by email or follow me on Bloglovin!!!

Love Rach x

PeterMark Hair Show

I was very flattered and honoured to be chosen by Ciaran Cannon and Alex Seery to be their hair model for the first stage of the PeterMark Colour Awards in Style Club on South William Street. Everyone involved takes this competition very seriously so I am so excited to be apart of this event! Ciaran and Alex are taking their inspiration from the 1970's era, so we're talking big amazing hair and beautiful blonde and copper colours. 

Alex applied the colour on Monday afternoon and Ciaran has been styling it to competition standard a few times since. The styling is amazing also, low cut green velvet dress with a killer (literate wording) train and the makeup (by me) is going to be beautifully smoked dark browns, blacks and my all time favourite Antiqued by MAC. 

The show is this evening so expect a lot of photos from me and my Dream Team! Here is a photo of the set I had to sleep (or not sleep) in last night. Reminds me of my Irish dancing days. 


Only one team gets through from this stage to represent the salon and compete against PeterMark salons nationwide. 

WISH ME GOOD LUCK!!!!! 

Tuesday 17 September 2013

Body Care


We have all been feeling the winter weather as of recent with blustering winds and the night creeping in a few hours earlier. With the harsh weather this season is going to bring we need to protect our skin from drying out and becoming dehydrated. During spring and summer a light moisturising lotion would suffice but during September to January something more protecting and more rich is required.

For the next few months your skin is going to need an extra little something. I am in love with body butters (obsessed would be closer to the truth), I love their texture and range of fragrances different brands provide. They hydrate your skin for the entire day and make you feel protected from head to toe.

Unfortunately, it would be impossible for me to name all of the brands I enjoy so I have narrowed the list down to my favourite top 5 body butters out there at the moment.

In no particular order........

1. Bodyshop - Body Butter
This product comes in 12 scents and it beautifully rich and creamy. Coconut is my favourite scent as it is not too sweet and reminds of my summer holidays abroad. 


2. L'Occitane-  Shea Butter Honey Whipped Body Cream
Discontinued in 2007 it finally made its way back into our hands again (thank goodness) with its amazing texture and 10% Shea butter it is EXTRA moisturising. 


3. Moroccan Oil - Body Butter
This concentrated body butter provides an abundance of nourishment, long lasting hydration and locks moisture in for long time repair.

4. Soap&Glory - The Righteous Butter
Winner of Woman&Home's  Best in Beauty in 2012 this product is also a winner in my eyes. It leaves you smelling divine for the day and protects you at the same time.

5. LUSH - King of Skin
This body butter bar is great for your skin. Just rub it onto dry skin rinse it off in the shower and pat yourself dry. Is also brilliant for shaving as well (secret tip).


Don't forget to subscribe by email or follow me on Bloglovin!!!

Love Rach x


Bloglovin

Bloglovin is a very cleverly inspired website and app that allows to read all of your blogs in one place.

Check it out here


<a href="http://www.bloglovin.com/blog/9796473/?claim=25ufhjceems">Follow my blog with Bloglovin</a>


Monday 16 September 2013

Cara Delevinge Brows

Power Brow
Brows, brows beautiful brows. It has become very obvious that ever since Cara Delevinge came into the public eye, brows became more important than we realised. Those great thick, full brows frame the face and give a touch of powerful masculinity.

Whether you have already thick and full brows, thin browns or very dark brows there are tips and tricks to get those sought after Delevinge brows you've always craved.

Step by step:
1. Brush your brows upwards using an eyebrow brush. This way you have already made your brows appear fuller and you can see exactly where you need to fill in.

2. Use flick motions with your pencil or angled brush to create natural looking hairs when you are defining and shaping your brows. Work from the bottom of your inner brow to connect to the bottom of the inner corner to create that boxy style.

3. Fill the arch of your brows. Lightly colour above your arch to create lift.

4. Fill in the end of the brow to make a statement shape.

5. Create a 3D effect in your brows by using a darker shade on the bottom section and lighter tone on top.

6. Using a clear brow gel,  brush and set your brows upwards to create that full effect.

7. Using a highlighter, highlight underneath the brow and blend with your finger.

NB
- Never try to change your brow shape by yourself.
- Hair growth cycle is 8-12 weeks so be patient if you're growing your brows.

Upkeeping
- Go for a tinting treatment twice monthly
- Tweeze those stray hairs between brows or underneath.

For Thick Brows:
- Instead of using pencil, use shadow. Creates more depth.
- Use a wet angled brush.
- Use a growth serum and book a threading treatment to define brow line.

For Dark Brows:
- If you don't like the effect plucking gives your brows, bleach the stray hairs instead.
- Instead of using clear brow gel use tinted brow gel.

For Thin Brows
- Book a brow appointment for HD brows.
- Avoid plucking like the plague.
- Buy a brow kit.
- Ue growth serum.

LA Creative Services
- Threading €15
- Brow Bar €35

LA Creative Brow Products
- Brow Palette €15

Get those brows looking gorgeous!


Don't forget to subscribe by email or follow me on Bloglovin!!!

Love Rach x